How Do I Unpack and Install a TPMS Kit?
Once you’ve gotten a TPMS kit, it might appear daunting installing it for the first time. Thankfully, all Promata’s kits come ready to use out of the box and this step-by-step guide will help you unpack, set up and install your system with ease. Proper tyre pressure is key to safe driving, better fuel economy and longer tyre life. With your new TPMS kit, staying on top of it just got a whole lot easier.
Step 1 - Unpackging Your TPMS Kit
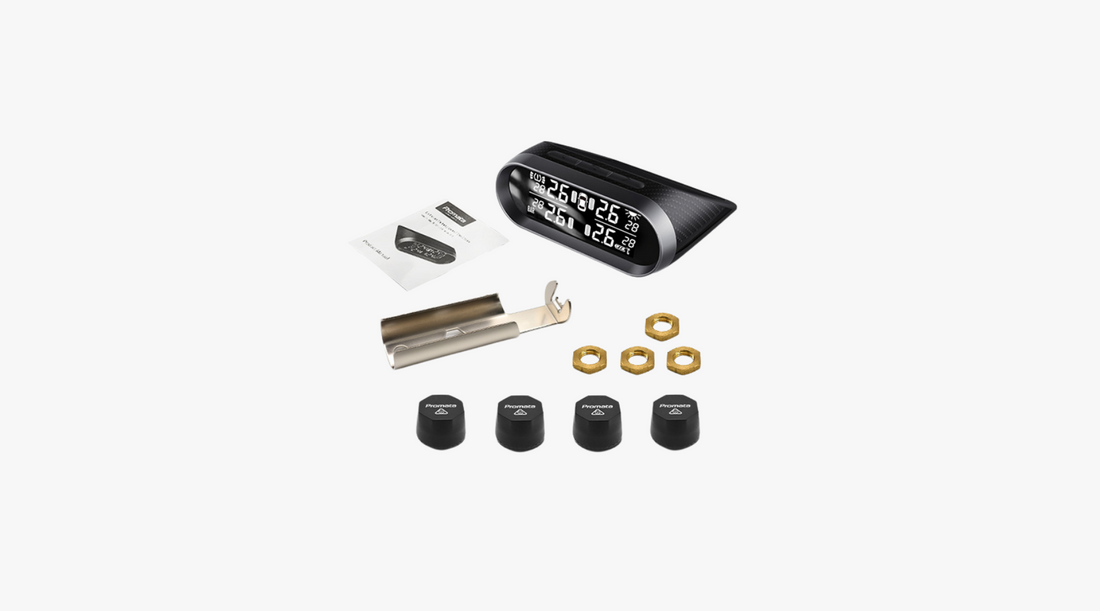
When your TPMS kit arrives, carefully unpack all the components. Your kit should include:
- A TPMS display unit
- External or internal sensors(depending on your model)
- Security lock nuts (applicable for external sensor)
- User manual for your TPMS model
Take a moment to inspect the contents and ensure everything is in good condition. If anything is missing or damaged, contact the seller immediately.
Step 2 - Read the Manual
Before diving into the installation, please take a few minutes to read the user manual. It might feel unnecessary but for those unfamiliar with TPMS units, going through the manual will save you time and frustration later. It provides specific instructions for your TPMS model, including how to operate the display, pairing the sensors and troubleshooting any issues.
Step 3 - Check the Display Battery
Please then turn on the TPMS display unit to check its battery level. If the battery is low, use a charging cable to charge it fully (for some models with in-built solar panels, you can place it under the sun to charge). A fully charged display ensures uninterrupted monitoring of your tyre pressure.
Step 4: Set Your Tyre Pressure Thresholds
Before installing the sensors, you’ll need to set the pressure thresholds on your TPMS display. To do this, please find your vehicle’s recommended tyre pressure. This information can be found on your car's manual or in some cases the sticker on the driver’s side door jamb.
Then, it’s time to set the pressure threshold (when the pressure goes out of these thresholds, that’s when you’ll get an alert). The exact way to do this will differ depending on the system you have but will be found on your user manual. For Promata’s range of TPMS units, this is done by entering settings mode. This is the mode where you can set not only the pressure thresholds but also change settings such as temperature, imperial/metric units, etc.
Generally for everyday driving, it’s recommended to set the threshold within +/- 10 PSI of the recommended cold tyre pressure.
If you’re into 4WDs or off-roading, you’ll need a wider range. We recommend setting a larger range such as 12 PSI to 55 PSI to accommodate varying terrain and driving conditions.
Step 5 - Install the Sensors
Once the settings have been confirmed, it’s time to install the sensors on your tyres. For external sensors, please follow the following steps:
- Use Security Lock Nuts (Optional): If your kit includes security lock nuts and you’re concerned about theft, attach them to the external sensors. These nuts prevent unauthorized removal of the sensors.
- Remove the existing valve cap on your wheels and screw on the sensor in its place (the sensor doubles as a valve cap).
That’s it. Your external sensors are now ready to use.
For internal sensors, the installation process is more complicated and generally requires the use of specialized tools or equipment. This is best done at a tyre shop or auto installer. While it may be more of a hassle, internal sensors last significantly longer than external ones and also have virtually no chance of outside damage or tampering.

Step 6 - Verify Sensor Detection
After the sensors have been installed, turn on the TPMS display and ensure it shows the pressure readings for each tyre. If any sensor isn’t detected, double-check the installation and ensure the sensor is properly tightened.

Step 7 - Monitor and Maintain
With your TPMS installed, you’re ready to hit the road! Regularly check the display to monitor your tyre pressure. If you notice significant changes in pressure, inspect your tyres for punctures or leaks. You can always recalibrate the thresholds if you change your tyres or adjust your driving habits.
Conclusion and Tips
Below are some bonus tips for helping you through this process:
- For the most accurate readings, check your tyre pressure when the tyres are cold and haven’t been driven for at least three hours.
- Avoid leaving your TPMS display in the sun on extremely hot days. Long heat exposure can damage LCD screens.
- For Promata TPMS display monitors, you can pair new sensors once your existing ones run out of battery.
- If you need to rotate your tyres, our TPMS sensors have a tyre swap function to ensure the sensors are correctly mapped to their new positions.
- For long vehicles or caravans, installing a KC-01 Signal Range Booster to strengthen sensor signals is recommended especially for the sensors that are further away from your TPMS display monitor.
By following these steps, you’ll have your TPMS kit up and running in no time. Not only will you enjoy peace of mind knowing your tyre pressure is always in check, but you’ll also extend the life of your tyres and improve your vehicle’s performance. Safe travels!


